The Expense feature in Track-New Software is designed to help you efficiently manage and track your expenses.
Expense Feature How is it Works?
Here’s a comprehensive guide to get you started:
1. Navigating to the Expense Feature
To access the Expense feature, log in to your Track-New account and navigate to the “Expenses” tab in the main menu. This section is where you can view, add, and manage your expenses.
2. Adding a New Expense

3. Uploading Bills and Receipts
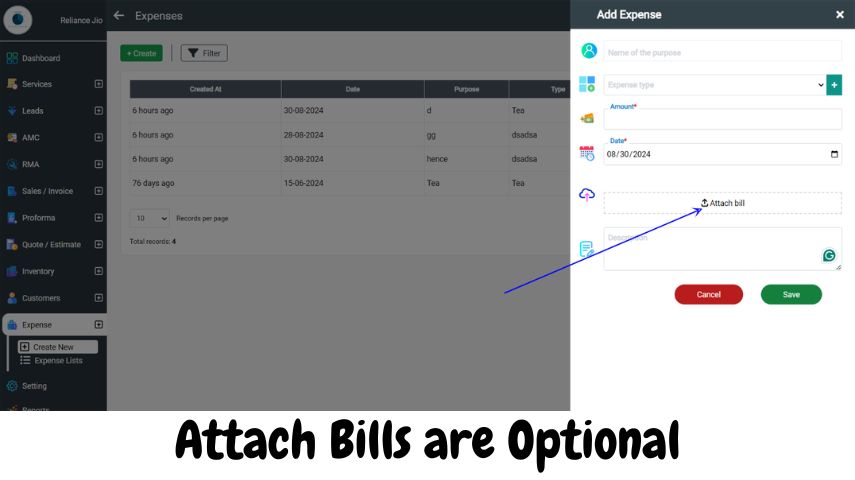
Track-New allows you to upload bills and receipts for better documentation and tracking. Here’s how to do it:
a. During Expense Entry:
- Step 1: When adding a new expense, look for an “Upload Bill” or “Attach Receipt” option in the form.
- Step 2: Click on the upload button and select the file from your device. Accepted file types may include PDF, JPEG, PNG, etc.
- Step 3: Once the file is uploaded, it will be attached to the expense record, and you can view or download it later if needed.
b. Editing an Existing Expense:
- Step 1: Find the expense you want to edit in either Gridview or List View.
- Step 2: Click on the “Edit” button next to the expense entry.
- Step 3: In the edit form, use the “Upload Bill” button to add or replace the attached file.
- Step 4: Save your changes to update the expense record.
4. Viewing and Managing Expenses
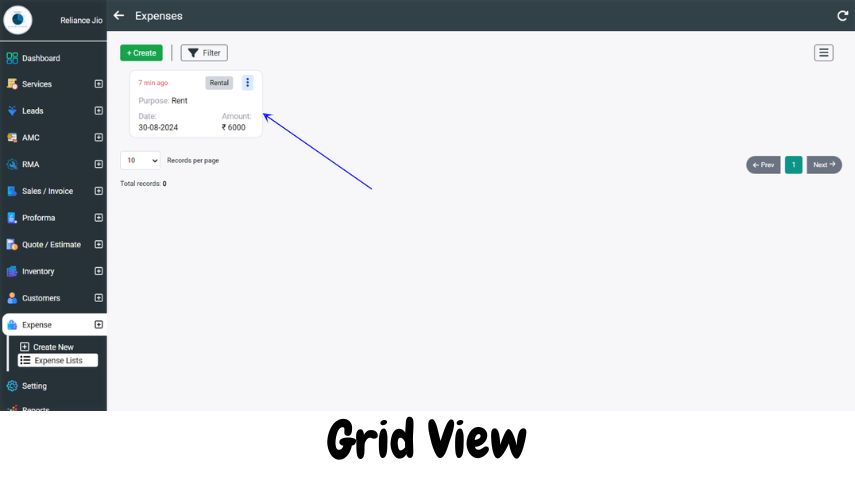
a. Gridview:
- Step 1: The Gridview presents expenses in a tabular format with sortable columns.
- Step 2: You can sort by date, category, or amount, and filter expenses based on various criteria.
- Step 3: Use the search bar to quickly locate specific expenses.

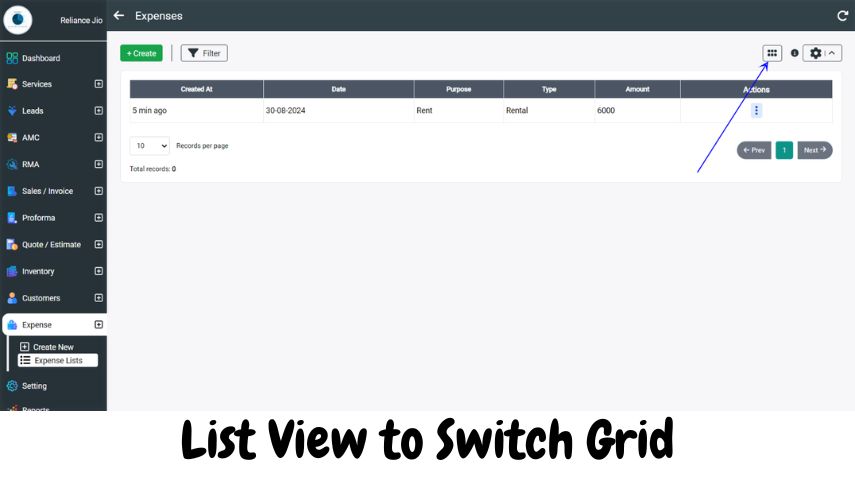
b. List View:
- Step 1: The List View displays expenses in a more detailed, itemized format.
- Step 2: Each entry provides more extensive details, and you can click on individual items to view or edit them.
- Step 3: Use the built-in filters to narrow down your list based on date range, category, or amount.

5. Generating Reports
To gain insights into your spending, Track-New offers reporting features:
- Step 1: Go to the “Reports” section from the main menu.
- Step 2: Select “Expense Report” and choose the date range and categories you want to include.
- Step 3: Generate the report to view a summary of your expenses in tabular format.
By following these steps, you can efficiently manage and track your expenses using the Track-New Software. Whether you prefer Gridview or List View, the software provides flexible options to suit your needs.
